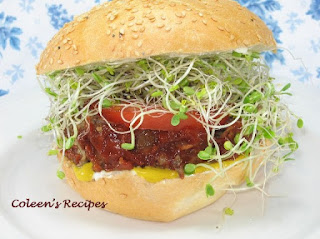
With that in mind, I decided to try "baked meatloaf burgers" and they were a big hit; we ended up with the best part of the meatloaf in EVERY sandwich!!
healthy pinch of black pepper
BAKED MEATLOAF BURGERS FOOD RECIPESBy Coleen Marie
All About Women story fashion style home kithen food recipes interior
BAKED MEATLOAF BURGERS FOOD RECIPES
BEST MEATBALL SANDWICH EVER !! FOOD RECIPES
UPSCALE SLOPPY JOES FOOD RECIPES
CRISP BACON and GUACAMOLE SANDWICH FOOD RECIPES
Now this last suggestion is not for everyone, but my picky-picky hubby absolutely loves it. On day two, I pull this pork apart and mix it with a little of the sauce (make sure you include some pineapple out of the sauce). While its still cold, I roll it into a large burrito size tortilla (folding in all the ends) and then I brown the whole sandwich in a little butter until its piping hot. Hubby is extremely UNdemostrative when it comes to food, but he ooohhh'd and ahhhhhh'd about this sandwich until the last bite.
SWEET & SOUR PORK RECIPE FOOD RECIPES
DOUGH
¾ cup very warm water
½ cup sweetened condensed milk (not evaporated)
¼ cup vegetable oil
2 tablespoons sugar
1 large egg (room temperature)
3½ cups all purpose flour
2 tablespoons dry active yeast
1 teaspoon salt
Mix the warm water (hottest out of your tap) with the sweetened condensed milk, vegetable oil and sugar and salt. The hot tap water will cool down in temperature once it is mixed with the oil and milk (so it won't hurt the yeast). Next, whisk in the egg and the yeast. Let this sit for several minutes until the yeast looks well dissolved.
NOTE: When you first mix up this dough, it will seem stiff and dense. Don't let that freak you out...just follow the instructions and it will bake up beautifully.
Once it is well dissolved, mix in the flour (using a stand mixer is easiest) and mix with dough hook on medium speed until smooth (about 5 minutes or so). Place in a bowl sprayed with vegetable spray and cover with plastic wrap. Let this sit in a warm place for an hour or until it is double in size.
.
Remove from the bowl and cut into 8 pieces (makes 8 sandwiches). Roll each piece out into an 8 inch circle. For pizza filling, put about ¼ cup of cheese in center of circle; top with a little pizza sauce and some toppings.
I found that these were easier to shape if you sit the 8" circle in a cereal bowl before you add the fillings (see above photo). Draw up the edges of the dough and pinch them together like this
This dough is a dream to work with...it stretches without tearing and sticks together beautifully when it comes time to "pinch it shut".
A word about pizza fillings:
I filled these with sweet Italian sausage and some thin strips of pepperoni. I fried this in a pan until it was very well done, then I drained it completely and blotted all of the grease I could get out of it...I highly recommend this step. Don't add any meat that has not had the fat rendered out of it (sausage, pepperoni etc.). If you do, the fat will make the sandwich greasy and leak out of the pinched seam. Once pinched shut (make sure you pinch it totally shut...place them pinched seam side down on a parchment paper lined baking sheet. They will look like this:
Cover with plastic wrap and let them sit for 20 minutes. Bake in pre-heated 350F oven for 20 minutes. When they come out of the oven, brush them with butter. Aren't they pretty? Be careful when you first bite into them...they are SO hot inside.
I also made them the other day using a ham and cheese filling.
NOTE: These sandwiches stay super hot for an unbelievable length of time, so they would be excellent for a potluck or picnic (they are also excellent at room temperature). This dough recipe makes 8 big sandwiches, but you could easily make them smaller for a party snack.
.
NOTE: I have plans on making these, using sloppy joe filling, barbecue beef filling, bacon and egg filling and much more. I can see many uses for this sammie.
.
NOTE: The fully baked leftovers (full size) reheat, beautifully, in a preheated 350F oven in 20-23 minutes and taste exactly like they did the first time they came out of the oven.
PIZZA BUNS FOOD RECIPES
2½ pound pork tenderloin
2 teaspoons chili powder
1 teaspoon ground cumin
1 teaspoon salt ½ teaspoon black pepper
1 cup favorite barbecue sauce
2 tablespoons honey
¼ teaspoon dried red chili flakes
Our market sells pork tenderloin in 2½ pound packages and there are two tenderloins in each package. Cut each tenderloin in three pieces. If you are using a pork roast, trim obvious fat and cut it into pieces about the size of your fist. Mix the dry ingredients (except for the chili flakes) and rub all surfaces of the meat; place, covered, in refrigerator for an hour or so.
Brown the meat in a couple tablespoons of canola oil then put it in the crockpot. Mix the honey & dried red chili flakes into the barbecue sauce and pour over the meat. Cook on low for six or seven hours - every crockpot is different. To check for readiness, use two forks to see if the pork will pull apart easily.
Remove meat from crockpot and pull apart with two forks. Stir sauce and put the meat back in the sauce to keep it hot.
The above sandwich was made with my bun recipe which you can find HERE
NOTE: It isn't absolutely necessary to put the meat in the fridge after you put the dry rub on it, but it strengthens the flavor.
NOTE: Turn the meat over a couple of times during the cooking cycle...not absolutely necessary.
CROCK POT BBQ PORK SANDWICHES FOOD RECIPES
2¾ cups all purpose flour
JUST FOR SMILES: When I ran spell check on todays post, it tried to change the word focaccia to cow catcher...how funny is that??
BASIC FOCACCIA BREAD -- TRY IT THIS WEEKEND!! FOOD RECIPES
4 cups all purpose flour
NOTE: I made a half recipe for just hubby and myself and it gave me five nice big tortillas. It is such a great dough, I'm sure you could double the ingredients as well if you are cooking for a crowd.
HOMEMADE FLOUR TORTILLAS FOOD RECIPES
Surimi Melts
OPEN FACE SURIMI MELT SANDWICHES FOOD RECIPES
Personally, I like my calzones stuffed to the brim with veggies and a little pizza sauce & cheese. I have found, through trial and error, that you have to saute your veggies until tender then drain them well on a paper towel. If you don't, you will get a soggy-bottom crust on your sandwich. Any veggies will work. Roasted veggies are excellent, so are grilled veggies. Tonight I was lazy, so I just sauteed some broccoli, mushrooms, garlic, green onions and kidney beans, but usually, the more veggie variety the better.
I use my regular bread dough recipe (CLICK HERE) and jazz it up with 1/2 teaspoon black pepper, 1 teaspoon onion powder and 1/2 teaspoon garlic powder(add seasonings when you add the liquid in the recipe).
My hubby came up with this idea about 10 years ago when I was complaining that my pizza stone wasn't working the way I wanted it to (I wanted a crispy crust with nice pillowy edges). He cut a 1/4" thick piece of steel (to fit my oven) and I seasoned it like a cast iron frying pan. After you have seasoned it, you never grease it or wash it again, just wipe it off.....nothing sticks to it.
VEGGIE CALZONE CUT IN HALF
VEGGIE CALZONES FOOD RECIPES
I searched long and hard for this whole wheat bread recipe. It makes great dinner rolls, hamburger buns and (best of all) excellent sandwich bread. It is just a basic whole wheat recipe, nothing fancy, but the bread is moist, flavorful and remains fresh longer than most homemade breads. I hope you will try it.
BASIC HONEY-WHOLE WHEAT BREAD FOOD RECIPES
2 pounds of extra lean ground beef (I use 93%)
TACO BURGERS FOOD RECIPES
For those of you not familiar with surimi, it is made from Alaska cod fish and seasoned to taste like crab. It comes in 16 ounce pouches in the fresh meat isle. Make sure it says "flake style" and "crab flavored".
In a large bowl, mix:
In a large frying pan, or electric skillet, melt 1 tablespoon of butter and 1 tablespoon vegetable oil. Fry patties until they are golden brown.
Budget Minded FAUX CRAB CAKES FOOD RECIPES
These days, with the kids all gone, I still occasionally go to this recipe as a “back up” when we go camping. I freeze the cooked filling in Ziploc bags (patted to a 1” flat shape so I can thaw it quickly). If bad weather prohibits us from cooking outdoors, this Sloppy Joe filling makes a quick “stuck in the motor home” lunch with no mess or fuss.
WEEKEND SLOPPY JOES FOOD RECIPESEach of these hamburgers is made out of two thin patties with mushrooms and cheese sandwiched in between. So mix everything (except the mushrooms & cheese) and make 8 thin patties. Top four of the patties with sautéed mushrooms and your favorite cheese and then a 2nd thin patty, pressing to seal the edges well. Repeat for the other three hamburgers.
If you are going to freeze these, wrap each one individually in plastic wrap and lay them flat on a cookie sheet to freeze. When they are frozen, you can stack them in a freezer Ziploc bag. Whether you are taking these on a camping trip or just leaving them in the freezer for a quick weeknight meal, they taste great.
HAMBURGER BUNS
This recipe will make at least 2 dozen hamburger buns. Once baked, they freeze extremely well. I find myself using them for everything from breakfast sandwiches to peanut butter sandwiches.
5 cups of all purpose flour
2 packets of dry active yeast (I use 2 tablespoons)
3 tablespoons sugar
3 tablespoons vegetable oil
1 tablespoon salt
2 ½ cups very warm water
In an electric stand mixer, place 2 cups of flour, yeast, sugar, oil and salt (stir to combine dry ingredients) Add 2 ½ cups of very warm water (see note). Stir quickly while you add the water. Let this mixture sit for about 10 minutes.
Add the rest of the flour, about ½ cup at a time, scraping the sides of your bowl and dough hook each time. Every time you stop your mixer, turn all of the dough mass over. Let your machine knead this dough until it CLEANLY comes away from the side of your mixer. If you have added all 5 cups of flour and it has not come cleanly away from your bowl, you need to add just a little more flour.
Once the dough comes cleanly away from the sides of your bowl, let the machine knead it for about five more minutes. Remove the dough and grease the bowl. Return the bread to the greased bowl and grease the top of the dough. Cover the dough with plastic wrap and let it rise for an hour (it will more than double in volume).
Punch the air out of your dough and let it rest (covered) for 15-20 minutes. This step is important because your dough will “behave” much better while you form it, if you follow this step. Pinch off pieces of dough about the size of a tangerine. Make each ball as round as you can. Roll each ball into a 5” circle. Resist the temptation to add more dough to make a thicker bun. At this stage, your buns need to be a lot thinner than you think. (about ½” thick). If you add more dough, you are going to end up with a burger bun the size of your face!
Place the formed buns on a greased baking sheet and spritz the top of the dough with just a little cooking spray. Cover with plastic wrap and let rise for about 45 minutes. Bake at 400° for 15-16 minutes.
If you are going to freeze these buns, let them cool completely first and freeze as soon as possible. About 4 to 5 minutes in a 350° oven will heat a frozen burger bun and make it taste like it was just baked.

MUSHROOM & CHEESE STUFFED HAMBURGERS with HOMEMADE BUNS FOOD RECIPESAll About Women Copyright © 2011 Design by Panji Media