Showing posts with label CLASSIC RECIPES. Show all posts

FOOD RECIPES : CLASSIC BANANA CREAM PIE

CLASSIC BANANA CREAM PIE Food Recipes, Every family holiday dinner, I make way too many desserts. There is usually a cheesecake, a cream/pudding type pie, a fruit pie, cookies and something "experimental". That just means it is a recipe that I really want to make but I know picky-picky husband wouldn't touch it, so I need my family to "step in" and try it. 

As fun as it is to try new recipes, the old classics are always a hit; this banana cream pie is a tried and true family classic; it is the "real deal". It has a baked graham cracker crust, cooked vanilla custard, bananas and the most delicious whipped cream topping I've ever tasted (it has cream cheese in it)

GRAHAM CRACKER CRUST
1½ cups finely crushed graham crackers
¼ cup white sugar
6 tablespoons melted butter
Mix everything well and pat into a 10" pie plate. Bake at 350 for 8 minutes.

PIE FILLING
3 tablespoons cornstarch
1 and 1/3 cups water
1 14 oz. can sweetened condensed milk (see note)
3 egg yolks, beaten
2 tablespoons butter
1 teaspoon vanilla extract
2 medium ripe bananas (cubed)

In a heavy saucepan over medium heat, dissolve the cornstarch in the water; stir in the sweetened condensed milk and egg yolks. Cook until thickened and bubbly remove from heat; add butter and vanilla. Set aside to cool slightly. Cube the bananas and fold into the slightly cooled pudding. Pour into cooled crust and lay some plastic wrap on the surface of the filling so that it doesn't form a skin. Chill in the fridge for about 3 hours. Frost with whipped cream topping.

WHIPPED CREAM (Stabelized)
I hope you do not skip this step because it really is delicious and "makes" the pie. This is my new "go to" whipped cream recipe.

(1) 8 ounce cream cheese (room temperature)
½ cup granulated sugar
1 teaspoon vanilla extract
2 cups heavy cream

With your electric mixer, beat the cream cheese, sugar and extracts in a large bowl until smooth (scrape sides to make sure you don't have any cream cheese sticking to the interior of the bowl). While the beaters are still running, slowly add the whipping cream (stop a couple times and scrape the bowl). Beat until you get stiff peaks. This makes enough topping to cover a 10" pie generously.

NOTE: Make sure you use sweetened condensed milk in the pie filling (and not evaporated milk).
CLASSIC BANANA CREAM PIE FOOD RECIPES
By Coleen Marie
Read more >>

FOOD RECIPES : CREAM PUFFS

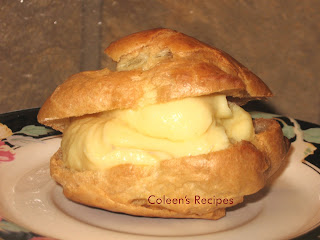
CREAM PUFFS Food Recipes, My dear English mother loved cream puffs and on rare occasions she would bring a couple of them home from the bakery in a small white box. We were allowed to "admire them", but we all knew they were a special treat for her and I can still picture her face as she closed her eyes and lovingly savored those first bites.

 I sure wish I had known how easy they were to make while she was still with us; I would have loved to make them for her; I miss you mom !!

CREAM PUFFS
1/2 cup butter
1 cup water
1/4 teaspoon salt
1 cup flour
1 tablespoon sugar (see note)
4 eggs
1 teaspoon vanilla (see note)

Mix the flour, sugar and salt in a small bowl and set aside. In a heavy bottomed saucepan, bring the water and butter to a boil.

Stir in the dry ingredients (all at once) and stir vigorously with heavy spoon until it comes together in a thick ball of dough. Remove from heat.

Put the hot mixture into a stand mixer, fitted with a paddle attachment, and start beating it on medium speed.  While the mixer is running, add the eggs, one at a time, beating well between each egg; add vanilla. Beat mixture for 2 or 3 minutes or until the dough is smooth and sticks to the sides of the bowl.

Drop by rounded tablespoons onto a parchment lined baking sheet.  Bake in pre-heated 425F oven for 20 to 25 minutes. They should feel light as air.

Remove from oven and this is important: Poke a small hole in the side of the baked cream puff to let out steam. If you don't, they might collapse as they cool. Makes about 18.

When the puffs are completely cool (they cool quickly), slice them in half, horizontally, and gently pull out any strands of extra dough you see (most of them won't have any). Put them back in a slightly warm oven for about 5 minutes to dry them out a little.

Fill them with anything you like. If you want to use them for a savory filling, like crab salad or something like that; I suggest that you leave out the sugar and vanilla in the recipe.

Cream puffs are great filled with fruit or whipped cream, or (our favorite) the following pastry cream.

PASTRY CREAM

2 cups milk (I use 1/2 and 1/2)
1/2 cup granulated sugar (divided)
1 teaspoon vanilla
6 egg yolks
4 tablespoons flour
3 tablespoons butter
pinch of salt

Heat the milk and 1/4 cup of the sugar in a heavy sauce pan over medium heat. 

Meanwhile, whisk the egg yolks and the other 1/4 cup of sugar until light in color, then add the flour and salt and mix very well (I do this with a little hand mixer).

When the milk JUST begins to boil, remove it from the heat and slowly drizzle about half of the hot milk into the yolk mixture (whisk like crazy when you do this). Once well mixed, put everything back into the pan and whisk while you bring it back to a boil.  Use a spatula to make sure everything from the edges is well mixed.

Bring to a boil, stirring constantly, and boil for about a minute (it will be very thick). Remove from heat and mix in the butter and vanilla.

Place plastic wrap directly onto the surface of the hot pastry cream and chill. This cream will keep well in the fridge for a few days.
Fill the cream puffs just before you serve them. Refrigerate any leftovers.
CREAM PUFFS FOOD RECIPES
By Coleen Marie
Read more >>

FOOD RECIPES : CHICKEN SOUP FOR A SICK HOUSE

CHICKEN SOUP FOR A SICK HOUSE Food Recipes, I haven't posted much lately because picky-picky husband and I have had the flu. Not just your every day "better in a week flu", but the old fashioned (don't even get out of your jammies) flu that has plagued us with lethargy and coughs for almost a month.

Our meals have been simple and mostly from the crock pot (or frozen food entree aisle) but then we haven't had much of an appetite either. Now that we are feeling a little better, I am venturing back into the kitchen.

This chicken soup has been a life saver for us during this time. I just keep it going in the slow cooker, adding a little more broth and veggies when necessary. It is a super simple recipe and if your family is coping with this ugly flu, like we are, I hope you will give this magic "elixer" a try.


6 large boneless-skinless chicken thighs (dark meat has the best flavor)
1 cup chopped onion (I like to use sweet onions)
1 cup chopped celery
1 cup chopped carrot
2 quarts of good chicken stock (I use the boxed kind)
1 tablespoon chicken bullion granules
1/2 teaspoon black pepper
1 teaspoon salt
pinch of dried thyme
pinch of poultry seasoning
2 cups favorite veggies (I use frozen mixed veggies)
spaghetti or fettuccine noodles (they hold up better than other noodles)

Cube and brown the chicken thighs in a tablespoon of oil until you get brown crusty spots on the chicken. Remove from pan and put it into the crock pot. In the same pan, saute the onion, celery and carrot until they get a little soft. Use a spatula and use the moisture in the veggies to de-glaze any crusty bits left in the bottom of the pan. Add this mixture into the crock pot ; those crusty brown bits in the pan are PACKED with chicken flavor.

Add the broth, 2 cups favorite veggies, bullion granules and salt and pepper. Stir and cook on high for about 6 hours, stirring once in a while. Half an hour before you serve this soup, break the noodles into 4" pieces and put into hot broth and stir. The noodles should be ready to eat in about 30 minutes.

NOTE: I have tried many different kinds of noodles in this soup. Spaghetti seems to hold up the best without turning to mush if you are cooking the soup for a long time or overnight. I also use rice instead of noodles, however, DO NOT put the rice into the soup (after a while, it will deteriorate and make your soup a mushy mess). Instead, make the rice separately and put a big spoon of it in your soup bowl and ladle the soup over the rice.

NOTE: Any cut of chicken will work in the soup, however, the dark meat gives the most flavor and after 6 hours, it will still be very moist and "fall apart" tender.


NOTE: Any kind of veggies can be used for the "favorite veggies" part. Just make sure you use veggies that will stand up to long cooking. I usually use a frozen veggie mixture that has peas, corn, green beans and carrots, but anything will work (just don't used canned veggies).

NOTE: Homemade chicken broth is best, but I never seem to have any when I want to make this soup, so I use a good quality BOXED chicken broth (just don't use bullion and water to make broth).
CHICKEN SOUP FOR A SICK HOUSE FOOD RECIPES
By Coleen Marie
Read more >>

FOOD RECIPES : GREAT PIE CRUST

GREAT PIE CRUST Food Recipes, A We have all made (and eaten) pie crusts that are flavorless, flat tasting, sort of soggy and, little more than something "necessary" to hold the fruit filling, ha ha!! Well, that does NOT describe today's classic pie crust.

This pie crust is absolutely delicious. It makes three single crust pie shells and bakes up very flaky, very flavorful and very tender. Picky-picky husband RAVED about this pie crust (and he is NOT a rave kind of guy, if you know what I mean).

This dough is extremely easy to work with and because there is a little sugar in it, it bakes to a beautiful deep golden color. You will NOT be disappointed with this pie crust recipe!!

Click on this photo to get a better look at the pie crust.
4 cups all purpose flour
1¾ cups butter flavored Crisco
3 tablespoons sugar
1 teaspoon salt
1 large egg
½ cup cold water

Mix the flour, sugar and salt, then cut the butter flavored Crisco into it with a pastry cutter (or two forks) until the mixture is crumbly.

Whisk the egg into the cold water, then pour it into the dry mixture. Mix till everything is moistened but do not overwork it.  Let the dough sit for about 10 minutes before you roll it out.

The recipe calls for chilling the dough for 30 minutes, but I don't find that is necessary.  Roll out the dough and use it in your favorite pie recipe.

NOTE: I always brush my top crust with a mixture of 1 egg white whisked with a tablespoon of cold water. Whisk it thoroughly, then brush your top crust with just a little bit of it, then sprinkle with granulated sugar before you bake it.
GREAT PIE CRUST FOOD RECIPES
By Coleen Marie
Read more >>

CLASSIC SPLIT PEA SOUP

CLASSIC SPLIT PEA SOUP Food Recipes, We have lots of snow and it was five below zero a couple nights ago. That can only mean one thing; it is hot soup season!! I love having a pot of soup on the stove (or in the slow cooker) all weekend.  This is a great classic recipe for split pea soup; it is  quick, easy, packed with flavor and one of our favorite soups.
¾ pound smoked ham, cubed
1 cup onion chopped (I like Vidalia or sweet onions)
1 cup chopped celery
1 cup chopped carrot
1 pound dried split peas (rinsed)
2 quarts chicken stock
2 medium potatoes, peeled and chopped
2 teaspoons salt (see important note below)
¼ teaspoon black pepper
1 cup cream (or half and half)

In a large stock pot, saute onion, celery and carrots together in a tablespoon of vegetable (or canola) oil for a few minutes (they don't have to be cooked all the way through).

Add the split peas, chicken stock, potatoes, ham, salt and pepper. Bring to a boil, reduce heat and simmer slowly (covered) for about an hour or until the peas are very soft (stir occasionally).

Now you have to process the soup in a food processor or blender (stick blenders don't work very well for this), so work in small batches, processing the soup until very smooth and thick.

Return the soup to the stock pot and add the cream (or half and half). Stir well and reheat , but don't boil.  When you serve it, top it with some crisp fried bacon (optional). I like to decorate each bowl with a rolled up slice of bacon (looks like a "bacon rose" lol).
NOTE: Don't automatically add the 2 teaspoons of salt before you consider the following.  If you are using home made chicken stock that has not been salted, go ahead and use the 2 teaspoons of salt.

If you are using a soup base, like McCormicks soup base (a fantastic product), well it has salt in it (but not as much salt as bullion).

If you use this, I would use only ½ to 1 teaspoon of salt.  If you are using regular bullion, leave the salt out all together and taste the soup just before serving to check for salt content.
CLASSIC SPLIT PEA SOUP FOOD RECIPES
By Coleen Marie
Read more >>

CLASSIC APPLESAUCE CUPCAKES

CLASSIC APPLESAUCE CUPCAKES Food Recipes, I have been making these cupcakes for my kids since they were little. They all have teenagers of their own now, so, lets just say the recipe has been in our family a while. It is a simple, one bowl recipe, that produces a moist and flavorful cupcake in short order.

NOTE: Baking times for using this recipe in a 9" x 13" pan, a 9" square pan, or (2) 8" or 9" layers and cupcakes are at the bottom of this post.

2½ cups all purpose flour
2 cups sugar
1½ teaspoons baking soda
¼ teaspoon baking powder
1½ teaspoons salt
¾ teaspoon ground cinnamon
½ teaspoon ground cloves
½ teaspoon allspice
1½ cups applesauce
½ cup water (I use apple juice)
½ cup shortening (I use butter flavored)
2 eggs
1 cup raisins (I use golden)
½ cup chopped walnuts

Beat all ingredients (except raisins and nuts) in a large bowl with an electric mixer (on low) for 30 seconds, scraping sides of bowl. Then beat on high for 3 minutes. Stir in raisins and nuts and pour into greased and floured pans. It is just that quick and easy!!

NOTE: If you want to make half of this recipe (my mother used to call them "snack cakes"), just cut the recipe in half and bake it in a 9" square pan.

BAKING TIMES
9" x 13" pan = bake for 60 to 65 minutes
(2) 8" or 9" layers  = bake for 50 to 55 minutes
9" x 9" snack cake = 50 to 55 minutes
cupcakes = 20 minutes  (makes 3 dozen)

A toothpick, inserted in baked cake should come out clean when the cakes are done.

CLASSIC APPLESAUCE CUPCAKES FOOD RECIPES
By Coleen Marie
Read more >>

CLASSIC JELLY ROLL CAKE

CLASSIC JELLY ROLL CAKE Food Recipes, This is an old classic recipe. I see variations of it online (with a whipped cream filling) however, this recipe holds true to its name JELLY roll, and was filled with jam. It is definitely a crowd pleaser. This one is made with my raspberry preserves and it is one of Picky Picky Hubbies favorites.

3 eggs
1 cup granulated sugar
1 teaspoon butter extract
1 teaspoon vanilla extract
1/3 cup of water (see note)

1 cup of CAKE FLOUR (see note)
1 teaspoon baking powder
¼ teaspoon salt
1 cup jelly or jam
powdered sugar

Preheat oven to 375°. Line a 10” x 15” jelly roll pan with parchment paper and spray the parchment paper with cooking spray, set aside.

Lay out a clean kitchen towel, preferably one with little or no texture type surface (especially not terry cloth). Dust a generous layer of powdered sugar onto the surface of the towel (the same dimensions as the pan or even a couple inches bigger).


Beat the eggs, on high speed, until very thick and lemon colored (5 minutes). Gradually add sugar while the mixer is running. Put butter extract into a 1/3 measuring cup and then fill the rest of the measuring cup with water (water + butter extract should = 1/3 cup). Add vanilla and water/butter extracts to batter and mix well. Add flour, baking powder and salt to the egg mixture and beat just until batter is smooth. Pour into the prepared pan. Bake 12 to 15 minutes or until toothpick inserted in center of cake comes out clean. Slide a knife around the cake edges to loosen it from the pan. While cake is still hot, turn it out onto the powder sugared kitchen towel. Immediately roll up the cake (ALONG WITH THE KITCHEN TOWEL) starting with the narrow end, like this

Set the kitchen towel wrapped cake on a baking rack to cool for 45 minutes. When it has cooled for 45 minutes, unroll the cake/towel (gently peeling the towel away from the cake as you unroll). The surface now facing you will have no powdered sugar on it. Stir the preserves well, to get them all loosened up, then spread it on the cake. Gently roll the cake back up (with NO towel this time). Wrap the whole thing in plastic wrap and let it cool completely. When cooled, take plastic off and top with glaze.


JELLY ROLL CAKE GLAZE

1/3 cup of butter melted
2 cups powdered sugar
1½ teaspoons vanilla extract
½ teaspoon almond extract
2 tablespoons of milk


Whisk everything together. If it seems too thick, add another tablespoon of milk. If it seems to thin, add a few more tablespoons of powdered sugar. Spoon glaze onto jelly roll and let it drip down sides.

NOTE: Any kind of kitchen towel will work, but the more textured it is, the more the cake will want to stick to it. If you only have textured kitchen towels (like me) just be careful and pull the towel off of your cake slowly and it will come away fine.

NOTE: The cake will continue to get more and more moist (the moisture from the jam works its way through the cake). So the jelly roll will be at its prime after it has been covered a few hours.Some cooks feel intimidated by jelly roll cakes, but this recipe is nearly a foolproof. The main trick to rolling cake is that it has to be a special sponge type cake to work (don't just try ANY old cake recipe).

Here are a couple more tips:
Remove the HOT cake from the pan and trim any dry edges (that will keep it from cracking when you roll it).

Roll the cake AND THE TOWEL up immediately, don't let it cool down. Let it sit for a full 45 minutes then unroll and spread jam and roll back up immediately. Lay it on plastic wrap and wrap tightly. This will help also help the cake from mis-shaping while it cools (although I've never had a problem with that).
The biggest trick is to get the cake right in the first place. Whip those eggs a full five minutes. The pan size is another thing. For this recipe it HAS to be a 10x15. A thinner cake rolls easier than a thicker cake.
If you don't have butter extract...just add an extra teaspoon of vanilla OR a teaspoon of rum extract.

CLASSIC JELLY ROLL CAKE FOOD RECIPES
By Coleen Marie
Read more >>

ULTIMATE SHORTBREAD COOKIES

ULTIMATE SHORTBREAD COOKIES Food Recipes, These shortbread cookies melt in your mouth, they are super easy to make (with few ingredients) and they are foolproof!!

 I have been trying different shortbread cookie recipes for years and they have always been a pain. Either the dough is crumbly and hard to roll out, or the "easier" ones that you pat into a pan look ugly to me (lol) and then there are the ones that handle beautifully, but you don't get that melt in your mouth shortbread taste. Well, I'm happy to report that I have found a winner... todays recipe it is absolutely perfect!!
.
2 cups of butter (room temperature)
1 cup of granulated sugar
4 cups all purpose flour
2 teaspoons vanilla extract
1 teaspoon coconut extract (see note)
.
In a stand mixer, beat the room temperature butter, sugar and extracts until the mixture is light and fluffy (2-3 minutes on high).
.
Add the flour, one cup at a time, beating well between each addition.
.
Roll the dough into two logs and wrap in plastic wrap, then chill until very firm.
.
After "logs" are very firm, roll them in sprinkles nor nuts (optional) and slice into ¼" slices. Bake on ungreased baking sheet in a 350 degree oven for 18 to 20 minutes (mine were lightly golden in 18 minutes). Cool on baking rack.
.
NOTE: The coconut extract isn't absolutely necessary, but its such a nice addition. The funny thing is, is that you do NOT taste coconut, but you do taste a richness and sweetness that is slightly reminiscent of those Danish cookies that come in a tin at Christmas (but even better). If you don't use coconut extract, just use all vanilla extract.
ULTIMATE SHORTBREAD COOKIES FOOD RECIPES
By Coleen Marie
Read more >>

CLASSIC BREAD PUDDING

CLASSIC BREAD PUDDING Food Recipes, "Classic" recipes are classic for a reason; they are great old recipes. Bread pudding is one of those classic recipes that most people have a fond childhood memory of. It doesn't take any special ingredients, it is inexpensive and easy to make. It is total comfort food, so it works well for any family gathering or holiday.

10 slices of white bread cubed (see note)
¼ cup melted butter
1 teaspoon ground cinnamon
pinch of ground nutmeg
½ cup raisins (soaked)
6 eggs lightly beaten
¾ cup white sugar
2 teaspoons vanilla extract
½ teaspoon salt
3 cups hot milk
.
Preheat oven to 375 and spray a 9" x 13" baking dish with cooking spray. Put your raisins in a small dish and cover them with boiling water and ½ teaspoon of rum extract (if you don't have rum extract, just leave it out, but its very good).
.
Cube the bread (you can leave the crusts on or take them off, whichever you prefer). Place the bread cubes in the prepared baking dish and set aside.
.
Heat the milk, sugar, butter and salt until the butter melts (I use microwave), add vanilla & spices and whisk in the beaten eggs (whisk while adding the eggs).
.
Drain the raisins (throw away the liquid) and sprinkle them over the bread cubes. Pour the egg -milk mixture over the bread cubes. Let this sit for 15 minutes (important).
.
Before baking, sprinkle the surface with a little cinnamon sugar (or just sugar) and bake 30-40 minutes (my oven takes 35 minutes). Bread pudding is done when knife inserted in the center comes out clean.

Serve warm (not hot) with whipped cream or ice cream.

NOTE: This recipe works better with bread that isn't super fresh/soft. Specialty breads like brioche or egg bread work well.

NOTE: When making this for company, I use raisin bread, and I let it sit out in the air for a couple of hours to remove some of the breads moisture. I don't add other raisins.

NOTE: I hope you will all go over to Sweet as Sugar Cookies and take a look. Lisa, is hosting the neatest "Sweets for a Saturday" post. Tons of sweet goods to inspire you!!!


CLASSIC BREAD PUDDING FOOD RECIPES
By Coleen Marie
Read more >>

OLD FASHIONED APPLE CRISP

OLD FASHIONED APPLE CRISP Food Recipes, I've been tweaking this apple crisp recipe for most of my married life. I've tried a variety of spices, crusts, topping ingredients, apple types, nuts/no nuts, oats/no oats, baking times, etc. After many years of trial and error, we are happy with this final version. The apples are cut smaller than for a pie (see note) and the topping bakes into a sweet, crispy, nutty perfection.


I like to make this in a 2 piece 10" tart pan because it is very easy to serve and makes a pretty presentation, but any 9" or 10" pie plate would work well also.

(1) 9" or 10" single pie crust, placed into a tart pan (or pie plate) and chilled until the apples are ready.

6 Granny Smith apples (see note)
½ cup granulated sugar
½ cup light brown sugar packed
¼ cup all purpose flour
¾ teaspoon ground cinnamon
¼ teaspoon freshly grated nutmeg

TOPPING
2/3 cup light brown sugar packed
2/3 cup all purpose flour
½ teaspoon ground cinnamon
6 tablespoons butter
½ cup chopped walnuts

Peel and core the apples and slice them very thinly. Blanche the apples in boiling water for one to two minutes (depending on how thin you cut them). Don't cook the apples all the way through, they should still be slightly crunchy.

Drain very well and add the sugars, flour and spices (stir to coat evenly).

Make the topping: mix flour, brown sugar, cinnamon and cut in the cold butter until it is crumbly, stir in nuts. Place apple mixture into chilled crust and spread with topping mixture.

Bake in preheated 375 oven for 40-45 minutes or until the filling looks bubbly. Cool before serving (see note).

NOTE: I like to serve this before it has completely cooled. When it has cooled down enough so that I can hold my hand (without burning it) on the bottom of the pie pan, it is time to eat it. I serve it with vanilla ice cream.


NOTE: I cut the peeled and cored apples into quarters and then cut the quarters in half before I start slicing them. This gives me smaller slices that work well with this crisp recipe.

NOTE: I encourage you to use freshly grated nutmeg if possible, it makes a WORLD of difference (so mellow compared to pre-ground nutmeg).

NOTE: Place your unbaked apple crisp on a cookie sheet before putting it into the oven. The heat from the cookie sheet will help brown the bottom of the pie crust. It will also help with any potential spill-overs.


OLD FASHIONED APPLE CRISP FOOD RECIPES
By Coleen Marie
Read more >>

CRANBERRY SAUCE

CRANBERRY SAUCE Food Recipes,
I have been trying out various side dishes and condiments with Thanksgiving in mind. Lately, I've been trying out cranberry sauce recipes. If you follow my blog, you know my dear sweet Hubby is a "purist" when it comes to a lot of foods. Actually, that just means he is very picky eater and doesn't like a lot of "extras" in what he eats. This simple cranberry sauce really fills that bill; he loves it and has asked me to stock up on cranberries for the freezer, with this recipe in mind.
Three Simple Ingredients:
12 ounces fresh cranberries
1 cup granulated sugar
1 cup pineapple juice (or orange juice)
Wash and sort the berries, and put all ingredients into a heavy bottomed sauce pan. Bring to a boil, then turn heat to a medium simmer and cook the berries (stirring berries about once a minute) for 20 minutes. When they first start to boil, the berries will actually pop, so cover the boiling berries with a splatter screen to reduce any mess.

If you like whole berry cranberry sauce, just pour it into a bowl and chill for a few hours For  Picky-picky Hubby, I press the sauce through a strainer to remove the berry skins. Sauce will thicken as it cools.NOTE: I am not usually a cranberry sauce fan, but I found this to be excellent.

UPDATE: Since I posted this, I've discovered that using half white sugar and half brown sugar is a fantastic addition.

CRANBERRY SAUCE FOOD RECIPES
By Coleen Marie
Read more >>

CLASSIC PEANUT BUTTER COOKIES

CLASSIC PEANUT BUTTER COOKIES Food Recipes, I have been making this classic cookie for so long (and so often) that I no longer need a recipe. It has been my "go to" cookie for decades. It is sweet, crispy (but not hard) and light as air. A great cookie for the lunch box, bake sale or to send off to your college freshman.

In a stand mixer, cream together:

½ cup butter flavor Crisco (no exceptions)
½ cup extra crunch peanut butter
1 egg
1 teaspoon good vanilla
½ cup dark brown sugar packed
½ cup white sugar
.
When this has been creamed thoroughly, beat in 1 & ¼ cups white flour, ½ teaspoon salt, ¾ teaspoon baking soda. Beat well.

Roll dough into 1" balls and roll them in white table sugar. Place them on a parchment lined baking sheet about 2" apart. Flatten with fork tines in a criss cross pattern. Bake in pre-heated 375 oven for 10-12 minutes (11 minutes is perfect in my oven).
.

NOTE: I've made this recipe using butter instead of the butter flavored Crisco and it produces an entirely different texture. It is no longer a "light as air" cookie and it gets very flat and thin. I hope you will try it with the butter flavored Crisco.
NOTE: If you do not have parchment paper, bake them on an UNgreased cookie sheet.
CLASSIC PEANUT BUTTER COOKIES FOOD RECIPES
By Coleen Marie
Read more >>

FLUFFY WHITE FROSTING

FLUFFY WHITE FROSTING Food Recipes,
Follow Me on Pinterest

This is a fantastic frosting recipe, for many reasons. First of all, it is delicious. After that, it is super easy, super quick, it takes no special ingredients, it is pretty to look at and it is very versatile. It is a classic.

 In a large  GLASS OR METAL bowl, put two egg whites, a teaspoon of vanilla extract and ¼ teaspoon of almond extract...set aside.
.
In a saucepan, mix 1 cup of granulated sugar, ¼ teaspoon cream of tartar, dash of salt and 1/3 cup of water. Cook and stir until it just comes to a boil and sugar dissolves.
.
Start beating your egg whites and extracts on HIGH while you slowly drizzle in the hot syrup. Keep beating on high until stiff peaks form like this:


With a hand held electric mixer, this can take up to 7 minutes, but with my stand mixer it only takes about 4 minutes. Recipe makes enough to frost a 9" two layer cake or a 10" tube cake.
NOTE: To get these lovely big swirls, use a Wilton tip # 1M...it is a huge tip and will duplicate these swirls with total ease...I promise.
Very light, this frosting is a dream to work with.

NOTE: The bowl AND beaters that you use, for this frosting, can have NO TRACE of grease or oil on them (or the frosting will not whip properly...right out of the dishwasher is perfect). A big stand mixer, like a Kitchen Aid, works the best, but this can be done quite successfully with a hand held electric mixer too (it just takes longer).

NOTE: While this frosting holds up well in all kinds of weather, it WILL form sort of a skin over the soft fluffy frosting if left in dry air for several hours. To prevent this, just cover it if you are not going to eat it the same day.

FLUFFY WHITE FROSTING FOOD RECIPES
By Coleen Marie
Read more >>

SHORTBREAD MELTAWAY COOKIES (and hubbies new hobby)

SHORTBREAD MELTAWAY COOKIES (and hubbies new hobby) Food Recipes, My Hubby has started a new hobby...wood turning and I couldn't be happier. I am quickly accumulating beauties like the piece below which is made out of birch (he harvests wind-fallen birch and spruce trees from the forest behind the house). He used to teach college level hand thrown pottery, so I'm guessing some of those skills have carried over to his new wood turning attempts. In any case, I am very happy with the results.

Today's Shortbread Meltaway Cookies are quick, easy and they literally do, melt in your mouth.
.
1 cup all purpose flour
½ cup cornstarch
½ cup powdered sugar
¾ cup butter (room temperature)
1 teaspoons vanilla
.
Cream the butter, in a stand mixer, until smooth. Add the rest of the ingredients and beat until the dough is well mixed and comes away from the sides of the bowl.
.
Roll dough into one inch balls and roll them in sugar. Place on ungreased cookie sheet and lightly press down with a fork. Bake at 350F for 10 to 12 minutes or until the outside edges of the cookie start to turn golden. Makes about 3 dozen cookies.


Next is another view of my newest birch "pretty". I haven't decided what to do with these yet, but I'm sure something will come to me. He has plans to do a big salad bowl next, I'll let you know how it comes out. I love the grains in the wood.


SHORTBREAD MELTAWAY COOKIES (and hubbies new hobby) FOOD RECIPES
By Coleen Marie
Read more >>

TACO SEASONING

TACO SEASONING Food Recipes, Make your own taco seasoning!! It is simple, quick, cheap and useful for almost anything. I use it on steak fajitas, tacos, Spanish rice, chicken and much more. It is so much more convenient (and tasty) than the commercial packets.

In a bowl, mix together:
12 teaspoons chili powder
8 teaspoons paprika (not the spicy kind)
8 teaspoons ground cumin
6 teaspoons onion powder
2 teaspoons garlic powder (not salt)
¼ teaspoon cayenne powder
2 teaspoons oregano
1 tablespoon beef bullion granules

Mix well and store in a tightly covered jar. Can be used as a dry rub or if you are making taco's, brown the meat and drain well. Add 7 teaspoons of this mix and ½ cup water to a pound of ground beef. Stir well and simmer until liquid evaporates.

NOTE: This is not super spicy, but it is very full flavored. If you like more heat, you can always add more cayenne. Approximately 7 teaspoons of this mixture will season a pound of ground beef.
NOTE: If you don't want to make a whole jar of seasoning...just divide this recipe by 4.
TACO SEASONING FOOD RECIPES
By Coleen Marie
Read more >>
 

All About Women Copyright © 2011 Design by Panji Media